Basic Case Management Tools
Assigned To – Click plus to assign the case to someone in your agency (e.g., investigator)
Case Status – Click received to change the case status (Received, In Progress, and Closed)
Case Type – Click compliment or complaint to change the case type (inquiry, referral, other)
Case Details
When clicking into a case, users are sent to the Case Details tab. The Case Details tab is a read-only view of information inputted from the civilian or oversight agency when making a compliment or a complaint.
Changing Case Type
Users can update the case type for any case entered into the Sivil system. Users can switch a compliment or complaint to inquiry, referral, or other. Note: a compliment cannot be changed to a complaint or vice versa. To update the case type:
- Click compliment or complaint
- Select case type from the drop-down
3. The case type is now updated
Note: All updates are captured in the case history tab
How to Assign a Case
Every case entered into the Sivil system can be assigned to an investigator who has been granted permission to access the agency’s Sivil account. Multiple investigators can be assigned to one case. To assign a case to an investigator:
- Click Assigned To to view a list of users who have been granted access
- Select an investigator from the list
3. The new investigator is now assigned to the case
To Remove an Investigator from a Case:
- Hover over the desired investigator and click X

2. Click, OK to confirm removing the investigator from the case—Select cancel to stop removal.
Note: To assign additional users, repeat the above steps.
Note: All updates are recorded in the case history tab
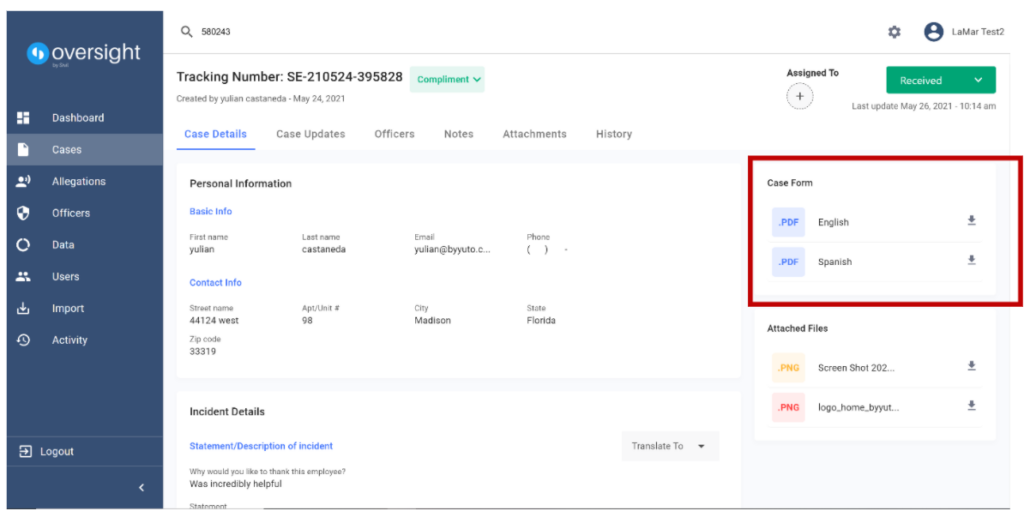
Download Case Details
Users can download the case details in English and Spanish by clicking the download arrow next to each desired language.
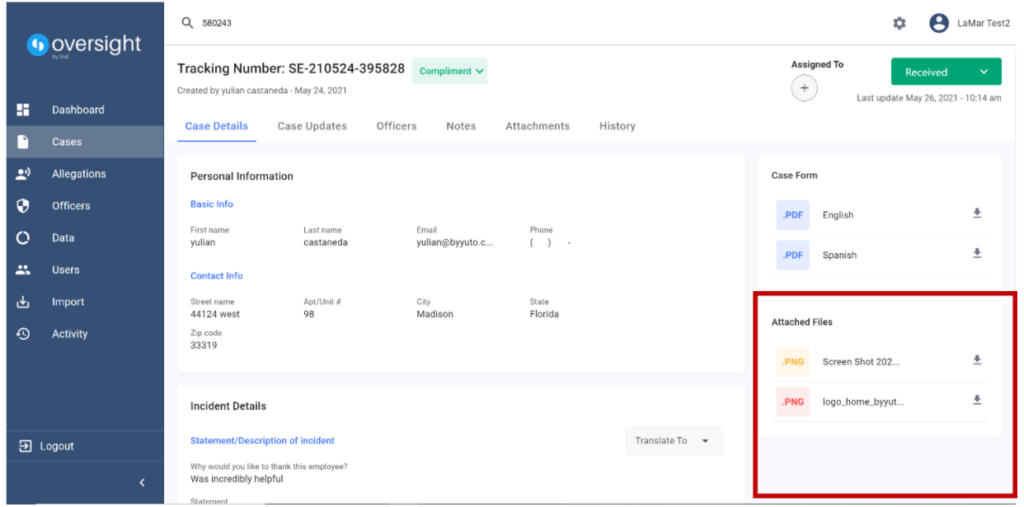
Attached Files
To view and download files attached(uploaded) to any case, click the download arrow next to each file listed in the Attached Files section.
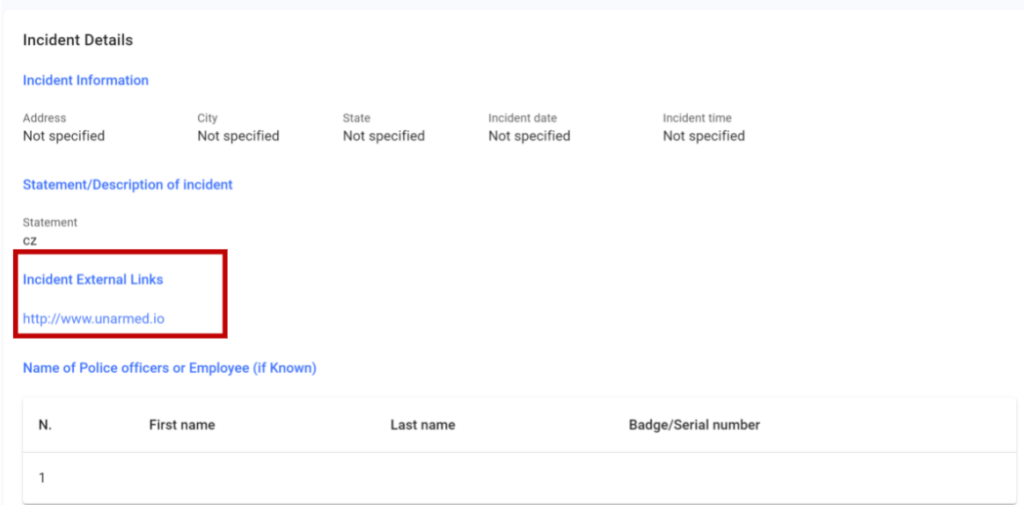
Viewing External Links
External links attached to any case are located under the Incident Details section. Click the hyperlink(s) to view.
Advanced Case Management Tools
Case Update Tab
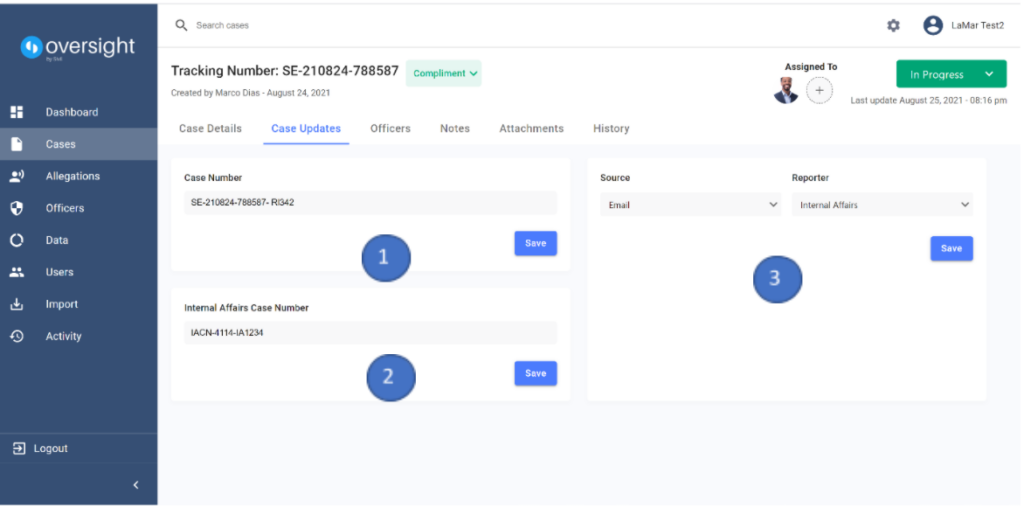
The Case Updates tab provides fields to edit the case number, internal affairs case number and the source and reporter information.

There are three sections of the case update tab:
- Case Number – Edit case number
- Internal Affairs Case Number – Edit internal affairs case number
- Source & Reporter – Update the source and reporter
Officers Tab
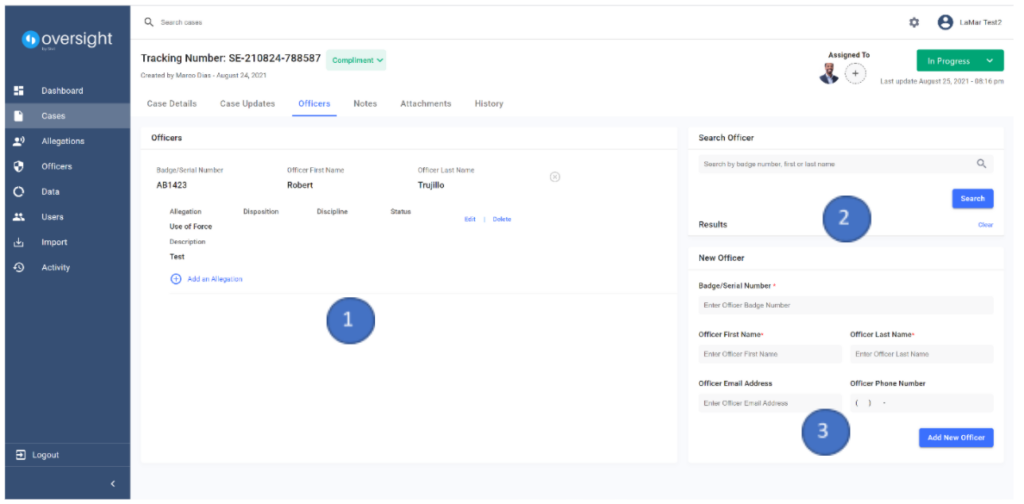
The Officers tab allows organizations to add officer(s) to each case and add specific allegations named in the case details to each officer. It also has allegation management tools to track and update each allegation status for each designated officer.

There are three sections of the case update tab:
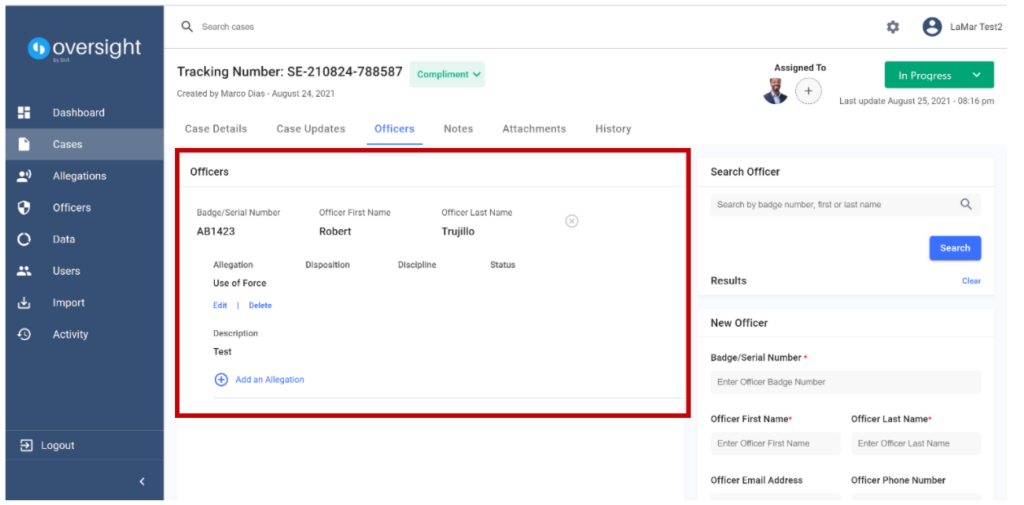
- Officers – Lists all officers attached to the specific case
- Search Officer – Searches all officers add to an organization’s Sivil account.
- New Officer – Ability to add new officers to an organization Sivil account database
How to Search for an Officer
- Click into the search field
- Enter officers’ badge/serial number, first or last name
- Click Search
If the officer is in an organization database, their name will appear below the search field

To clear results click Clear
Adding an Officer to a Case
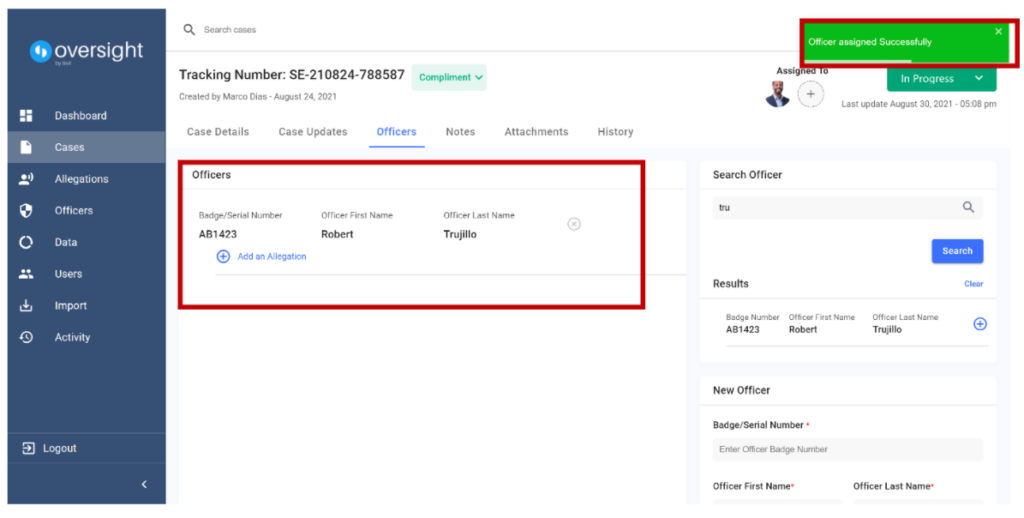
- To add an officer from the search results, click Plus symbol
2. The selected officer is now assigned to the case.
How to Add an Officer to Database
- Navigate to the New Officer section
- Click Badge/Serial Number
- Enter Officers first and last name
- Enter Officers email address and officer phone number
- Click Add New Officer
The officer is now added to the database and assigned to the case.
Attaching Allegations to Officer(s)
Once an officer is designated to a case, their information is displayed in the officer’s pane and can be managed further.
Adding Allegations to an Officer
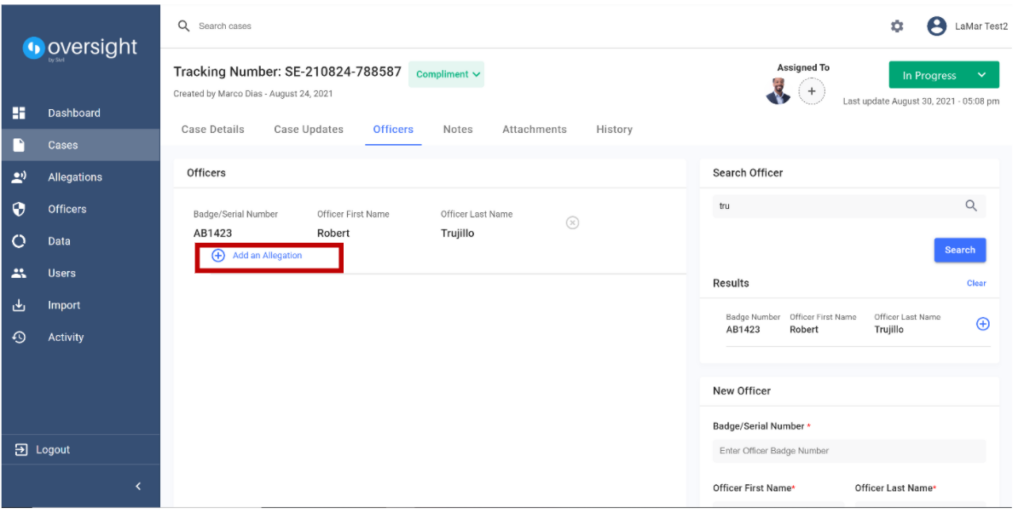
Users can add multiple officers to a single case and attach multiple allegations to each individual officer. Attaching allegations to officers creates a running list where organizations can view each allegation, disposition, discipline, and the status of each allegation. Organizations can use this to add an allegation to an officer:
- Click Add an Allegation
- Click Edit
- Select appropriate allegation, disposition, discipline, status, and add a description
4.Click Save
Example: An investigator assigns an officer to the case and attaches allegations named in the case details. The investigator chooses the appropriate allegation and changes the status to in progress. Because the investigator just started working on the case, they may not know the disposition and discipline. In this situation, once the disposition and discipline are determined, the investigator would update the case accordingly.
Note: To cancel adding an allegation to an officer, click Cancel Note: To add more than one allegation to an officer, click Add an Allegation

Click Delete to remove an allegation
How to Add Additional Officers to a Case
Organizations can add more than one officer to a case. To add additional officers to a case, use the Search Officer or New Officer function.
Deleting an Officer from a Case
- To delete an officer from a case, simply click X
2. Users will get a confirmation message; click Remove to confirm
A confirmation message is displayed in the right-hand corner confirming the officer has been removed.
NOTE TAB
Adding a Note and Attachments
It may be necessary to add note and attach required documents to a case. The note field supports an unlimited amount of characters. Attachments are limited to 4.76 mb at a time and support jpeg, png, word documents.
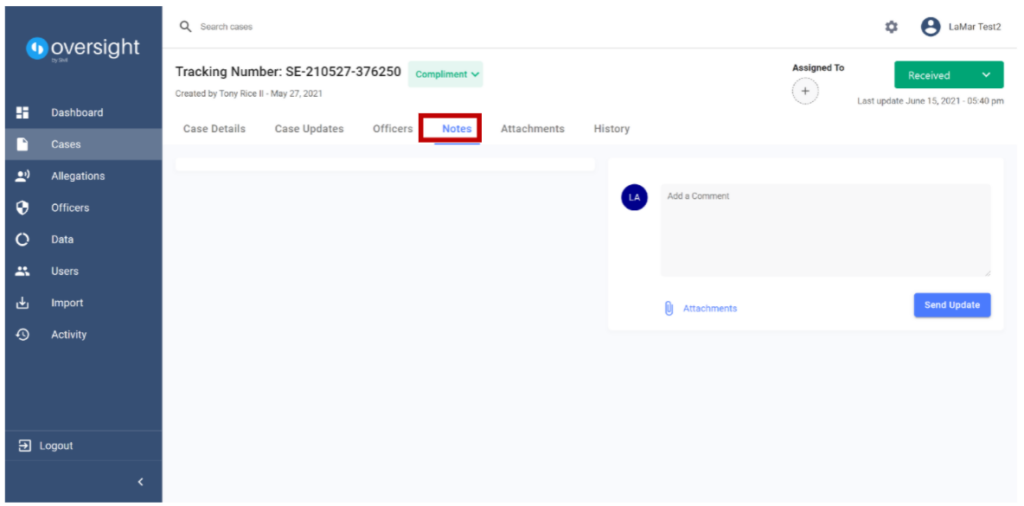
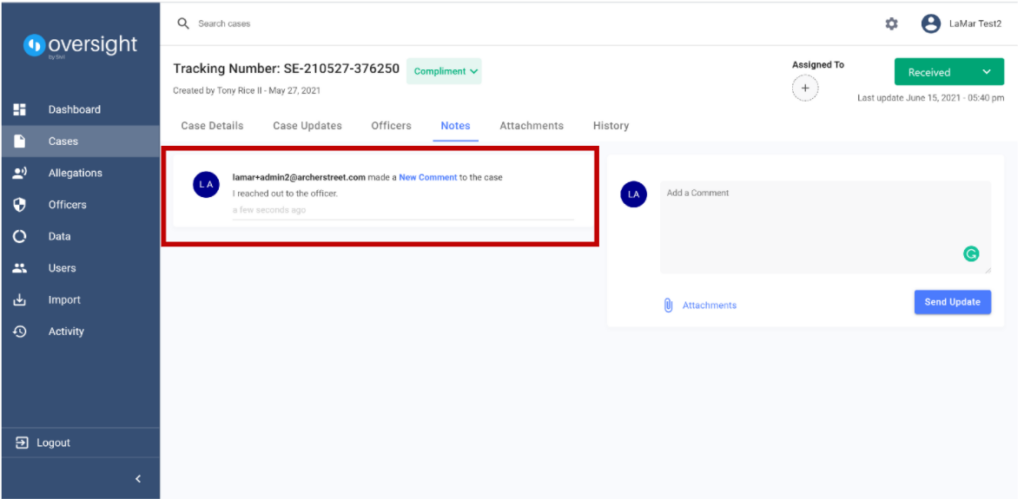
To add a comment
- Click into the dialog box
- Compose message
- Click Send Update
- A history of comments is displayed
To add an attachment
- Click Attachments
- Click box or Drag and Drop file(s) into the box
- Click Send Updates
Tip: You can add comments and attachments at the same time. Click Send Updates to save all changes.
ATTACHMENTS TAB
Users can attach and download a variety of files to each case
To add an attachment
- Click New Attachments
- Click box or Drag and Drop file(s) into the box
3. Click Add Attachments
4. All attachments are listed and available for download
HISTORY TAB
The History section keeps a record of all changes made in the Case Update tab. The history section can not be altered or deleted by anyone in the organization. All history is permanent.